Showing posts with label Oldhammer. Show all posts

Saturday, 3 January 2015

Oldhammer in York.

I headed over to York today for some gaming action with Thantsants of Somewhere the Tea's Getting Cold and Ollie our gracious host and author of The Second Founding.

This was actually the second session of gaming in 2015 already and the cause of much eye-rolling from SWMBO and a few demerits in the book of grudges too no doubt.

I GM'd a small but perfectly formed game of Warhammer 3e for the gents to kick off with. Thantsants' Druid had rustled up some local muscle to escort him to a mad wizard's cottage in order to stop a dangerous summoning ritual taking place while Ollie's Khorne boys were in town to ensure that said ritual went off smoothly and in good order. No doubt the protagonists themselves will tell their own tale on their respective blogs but suffice to say the Khorne general rolled up the rather tasty Bloodrage attribute and confounded all efforts to slow him down.

After lunch we moved forward in time and down in scale for some 'epic'.


We debated the way we wanted to approach the game and decided to run with the Future War Commander rules which were written by Peter Andrew Jones under the Specialist Military Publishing banner.

These rules give you a reasonably fast and free-flowing game which helps when there are three of you and bath-time is looming. We reached a satisfactory conclusion (well, Thantsants was satisfied) and got several game turns in and I honestly don't think we would have been able to say the same of a game one third this size using the Oldhammer Approved Space Marine rules (fond of them as I am).

Best of all all the minis were handsomely painted and fine sculpts while both games took place on beautiful tables. :)

As I intimated, Thantsants' Imperial Army won the laurels by seizing and holding two of the four objectives while Ollie's Tau and my own Eldar had to content themselves with a single objective apiece.

Thanks for stopping by!

Friday, 4 October 2013

Altenburg Chronicles PDF for WHFB2e.

Further to my Orctober post of a few days ago, here is a user-friendly PDF of the Bridge Over Troubled Water scenario. Thanks to those of you who expressed an interest in having a go at the scenario, I hope this proves handy for you. There's also a bit of extra fluff inside.


This wouldn't have been possible without the help of a friend, so special thanks goes out to Dreamfish who has made my day.

Thanks for stopping by!

Sunday, 8 September 2013

Oldhammer Weekend review. Part five.

Part one of the review.

Part two of the review.

Part three of the review.

Part four of the review.

And so to the conclusion. It's like the weekend is finally over, *sniff*. My photography is horrible and picks up all the glare from the glass and this is by no means a complete tour of the wonderful Foundry cabinets (because that has been done better elsewhere: Eldritch Epistles.) rather it's more of a personal view on the experience of being face to face with some classic childhood memories.

The first picture blows it straight away, this is neither a cabinet nor a childhood memory. It is, however, the Harry the Hammer artwork from the 1st edition front cover of our beloved Warhammer and so deserves a mention. It just hangs above the bar and is pretty damn cool.


You can't see a darn thing from here but the point of this picture is to emphasise the sheer wonder of getting close to one of the two Foundry cabinets. There is so much Oldhammer history collected in one place, it's overwhelming. Looking through the cabinets takes ages and once you're done you're left with the impression that the hobby really means something to so many people that it's hard not to feel a connection with their passion.


This one makes it into this post because I got that very feeling of connectivity, like when you read a line in a book and it's as if the author has read your mind. This is how I always pictured a Beastman unit should look. It's completely chaotic, with a small c as well as a large C. I'm not sure whether everyone remembers the Konrad books as fondly as I do, the bigger kids back then were rather disparaging of them in my local shop, but the representation of Beastmen in those pages stuck with me to this day. I am currently building a unit like this for the very first time.


Who hasn't got a memory of seeing a Genestealer Cult for the first time? I will wager for a lot of us it was this very one too. There are two exquisite limos, dozens of classic 'stealers and Brood Brothers and of course the sinister, cult hierarchy. The cult concept represents everything the 40K universe had to offer in those crazy days of the 80s and early 90s. There was corruption and seduction, the lust for power and glory, freedom of expression and inspiration, there was the marveling at the transformation of materials into models and most of all there was the joyful daydream of a stark raving mad vanity project of 70s prog-rock-esque proportions. That, is a 'stealer cult, that, is 40K.


Look at the picture for the count of three then come back to the text. Can you tell me what the models are? Probably not, because of that gorgeous, whacking great red banner! A well painted regiment is a joy to behold on the field of battle but a freehand banner of this quality is a thing of legend. Keep your Napoleonic colours and your medieval heraldry, give me a leering face or an incongruous, photo-real tiger any day!


This photo is all about the disgusting, glossy 'Thing-creature' crawling about at the back. It's conversions like this that elevate modelling into the same artistic sphere as painting or movie-making. It's pure, gruesome imagination pulsing insanely to life.


The Tzeentch warband. The Tzeentch warband. Dale Hurst's legendary warband is a touchstone for many a Chaos-worshipping Oldhammerer, and Gods I know I'm one. The attention to detail and the level of imagination involved is mind-boggling even to this day. Many an unwary soul first trod the dark path as a result of Dale's pernicious article in WD 135.


The second cabinet is all Foundry and though it's wonderful in it's own right and bridges the gap between the lost GW of our youth and modern times it would be better served if you viewed it in person the next time life sends you to Nottingham.


So that about wraps it up! No more Oldhammer Weekend for another year (*delerium tremens*). I hope you enjoyed the story as told through the eyes of an irrepressible gaming addict and nostalgia-addled lead-head.

Thanks for stopping by!

Friday, 6 September 2013

Oldhammer Weekend review. Part four.

Part one.

Part two

Part three.

Here is a bonus for you, the cabinet tour is still to come (I know, those of you who couldn't make it are getting fed up now, sorry). The bonus is the Golden Gobbo contest! Small, but perfectly formed.

A classic Slambo, looking very good indeed. I just love the intricate extra detail painted on the model and the lavish base too.


This beautiful Wardancer in subtle tones is from the skilled hand of Blue in VT. This entry was posted all the way from the U.S. which is something we will be looking to encourage in the future. Of course, you may be holding your own Oldhammer Weekend and inviting us to enter your competitions if Blue has his way! 


A stunning Chaos Champion conversion. This one was a cracking entry and it was a privilege to see up close, it's attributed to Fimm McCool I believe so thanks Fimm!


And the winner is! Nico's Gargant. Nico has a sumptuous style that won over the whole crowd, but more importantly it won over the Judge; artist Tony Hough.


Nico is on the left with the Mighty Dark-Winged Avenging Lord of Chaos himself and the no less reknowned Golgfag.


Hightail it over to part five immediately!

Thanks for stopping by!

Thursday, 5 September 2013

Oldhammer Weekend review. Part three.

Part one of the review.

Part two of the review.

Welcome to the table tour! Wargames Foundry welcomes people who want to drop in and have games so if you are able to visit Nottingham easily get in touch with them via their website which has a telephone number displayed on it. It's also a great place to hold a get-together. Those of you going to Blog-Con may be interested to see a few new tables the guys have put together since your recce mission.

Several blogging legends in this snap, I dare not unmask them just in case! This is a row of newly constructed tables built especially for the busy, upcoming period of scheduled events at Foundry. Right at the opposite end of the tables is a rack of Oldhammer minis cast up especially for the day! The table closest is the one we used for Orc's Drift (with Thantsants' excellent terrain), see part two for more details on that one.


This is Harry's amazing Blood Bowl stadium which saw plenty of action over the weekend.


This is the big table used for the 'Rumble in the Jungle' game organised by Padre. This game was huge (and impressive) and took up nearly the entire weekend!


There were several exotic units included in Padre's game, as well as the usual Lustrian suspects. I absolutely loved this armoured War-Gorilla unit!


All the exploring armies had to loot the many temples dotted about (note the siege equipment the Elves are carrying) in order to achieve their objectives.


Random encounters and refereed madness was the order of the day in this fine example of the almost lost art of GM'd Warhammer.


One of the stand alone tables available. Beware the temptation of playing wargames so close to racks of lovely minis! That's the board used for the Realm of Chaos games behind it, see part one for more detail on that.


There was a lot of LASER-cut MDF scenery available for use and you can see some of it here. I'm not sure who brought it to be honest but I know the Foundry has some terrain available. This battlefield is one of the big, connected row of tables depicted in the first photo.


This is one of the tables built for the British TV program 'Midsomer Murders'. Two of them stand on enclosed boxes and are tricky to lean over because you can't get your toes under them, but this one is worth the effort, it's quite lovely.


This is the second table on an enclosed box, the problems are exacerbated by the unusable nature of the first foot of board all the way around and it's not quite as attractive as the other one. It would be OK for a game of Saga in one of the corners though.


This one you can get your feet under and is also my favourite of the three. Hoping to get a game in on this one next time I'm down!


There was one more table in use, quite a large one too. There were reputedly 18000 points (3rd edition Warhammer) of troops in this game alone. Most people agreed that Nico, one of the participants, had the most drool-worthy army of the weekend. Golgfag's army was a stunning sight too though and full of classic lead.


I love this action shot of Golgfag's Orc General exhorting his rock lobber to fire faster while simultaneously goading the Trolls forward!


One more to go, the cabinet tour.

Thanks for stopping by!

Wednesday, 4 September 2013

Oldhammer Weekend: Bring Out Your Lead review. Part two.

Part one of the review.

The review continues in a safe and sound chronological manner. As I said previously the Realm of Chaos game completely dominated the Saturday but I did find time that evening to take part in the second scenario of Thantsants' 'Bloodbath at Orc's Drift' participation game (all in glorious 2nd edition) before we got stuck into curry and beer (that is to say even more beer, if I'm honest).


There's me! On the Wyvern! I'm swooping in to scoff some escaping Dwarfs and mules.


The initial three scenarios inform what Orc forces are available for the fourth and final battle and also what turn they arrive on. Although the first scenario involved the bloody massacre (the clue is in the name of this campaign) of some badly outnumbered Elves and their allies they performed well enough to score a lot of victory points thereby causing a problem for the Orc army in game four. In one of the three build-up scenarios the Orcish Monarch, King F'yar, is allowed to make a personal appearance. His presence makes a very big difference to the outcome in one game, but once that resource is spent that's it until game four. The GM randomised which game would have King F'yar available and it just so happened to be scenario two. I got control of King F'yar and his five loyal F'yar Guard while Gaj took control of the bulk of the Orc army.


King F'yar is swooping off on his Wyvern behind the trees living the easy life while his F'yar Guard contemplate how best to cross the fast-flowing river in full plate and the rest of the Orcs fight for control of the only bridge crossing.


Scenario one is about some good guys being in the wrong place at the wrong time and getting casually smooshed by a passing Orc Waagh. Scenario two is about some Dwarfs who are trying to get their freshly mined gold to safety before the pillaging Orcs roll over them. This is a risky choice for the little fellows but we all know Dwarfs really love gold. Sadly for the stunties King F'yar and his Wyvern made all the difference, the self-proclaimed royal Orc was able to head the sluggish Dwarf miners off at the pass and make 'short' work of all of them. The only casualty taken was a F'yar Guard that drowned while fording the river.


The last of the defenders make their stand as best they can. Inevitably, they end up as wyrm food.


The regular Orc troops blew the bridge crossing with their reckless full frontal assault tactics but King F'yar saved the day and also avenged the pyrrhic victory of the first game almost single-handed (almost single-handed; there was the whole Wyvern thing of course). BaOD is an outstanding campaign and one any Warhammer gamer should have a go at. I'm sure it could even be converted to any edition you like. I have an e-copy I can email you if necessary, just PM me on the BLOOD forum.

This brought Saturday's proceedings to a close!


The set-up for scenario three, Linden Way.


There were one or two sore heads on the Sunday morning and the Foundry felt a little like a Zombie movie gone very bad but fueled by sheer enthusiasm Thantsants and I played out Scenario three. This time the good guys are humans who have to shepherd off some refugees while delaying the Orc hordes. I played as the bedraggled Linden Way militia and although I got all the refugees off safe and sound I couldn't kill enough Orcs on my way to defeat to score enough victory points and the pendulum swung firmly in favour of the Orcs for the finale. It would be remiss of me not to give an honourable mention at this point to the senile old wizard Barrachus, who managed to muster just enough clarity of mind to shroud the Orc Shaman in mist long enough for the refugees to get out of Dodge!

With time running low and not enough players available four part four we chose to postpone the last game so that we can do it proper justice another time. We are planning to play it at the first YOBBOS (the Yorkshire Oldhammer group) meeting so watch out for the conclusion this November!

Still to come, the cabinet tour and the table tour.

Thanks for stopping by!

Tuesday, 3 September 2013

Oldhammer Weekend: Bring Out Your Lead review. Part one.

Well then. That was a good weekend! I've been deliberately putting off posting about the Oldhammer event, Bring Out Your Lead, until now because I have been very busy riding a wave of hobby enthusiasm! I've been organising new units, new paint schemes and the inevitable new eBay purchases! Finally I have calmed down enough to start expressing how the whole event panned out in words, I will begin at the beginning by talking about the Realm of Chaos multiplayer game that celebrated the 25th anniversary of the Slaves to Darkness book (well done to Orlygg because this was his brainchild).


The Realm of Chaos! Looks a lot like middle England, I know. I always suspected as much! 


The tower in the above picture is one of many historic gaming aids that are available to use at Wargames Foundry, this one was apparently made way back in 'the day' by none other than Nigel Stillman.


Lord Savage shepherds the Beastmen into battle while the swift Ogres go off on a flanking manouevre and the Dark Elven crossbows pepper the Khornate lackeys from afar.


I played Lord Savage as I envisaged him, he makes up for what he lacks in killing power by being cunning and biding his time. He continually used the tough, survivable Ogres (and his foolish allies of course) to hold up units while he encircled them. This plan helped the Slaaneshi faction knock out three enemy warbands in quick succession. It was fun to witness the typical Chaos God's intervention as one Khorne champion rolled up six summoned Chaos Warriors (*gasp!*) for a meagre one turn, (*sigh*). The battle eventually split into two smaller conflicts separated by about three feet of empty table and when the dust settled a large Slaanesh force was facing a small but elite Khorne force. There will be many tales told elsewhere of the legendary number of foes reaped by Jeff's Chaos Dwarf champion with the 'singing axe' but ultimately Lord Savage's patience won the day. Having stood off to allow all his Slaanesh rivals to die horribly while weakening the two remaining Khorne champions he was finally goaded into battle; only for his fear-causing Chaos Steed to tip the balance and bring about the ultimate defeat of the Khornate faction!

As I'm sure some of you recall this wasn't in the script! Lord Savage is only a level 10 hero and the idea was to evolve him into my Undead army's general in the form of a Liche. As it turned out he was the last remaining champion on the battle field at the end of play! The job of Liche will have to go to Mausolus. Savage was suitably rewarded with increased strength and the ability to teleport by a grateful Slaanesh, while 9 Giant Wolves joined his warband. The Beastmen were awarded with growth (x2) and mutated to twice their original size while the Dark Elf crossbow unit can now breathe fire! Lord Savage will be strutting over the tables of Yorkshire for the next 12 months having proclaimed himself 'Champion of Champions' and will return next year to face his challengers once more.


The RoC game was repeated on the Sunday but because the Saturday game took a whopping seven hours to play many of the original champions were busy elsewhere trying to absorb everything else BOYL had to offer (thus rendering it a lesser affair than Lord Savage's triumph of course). ;)


*UPDATE* Special mention must go to Martin's Slaaneshi warband which fought the two most powerful Khorne warbands to a standstill before finally succumbing. I hope to see the return of Kashawa the Bringer of Unknown Pleasures next time!

Thanks for stopping by!


Thursday, 29 August 2013

The Battle of Broken Barrow. Part Three.

Introduction.

Part One.

Part Two.

Thantsants' POV.

Thantsants' POV part two.

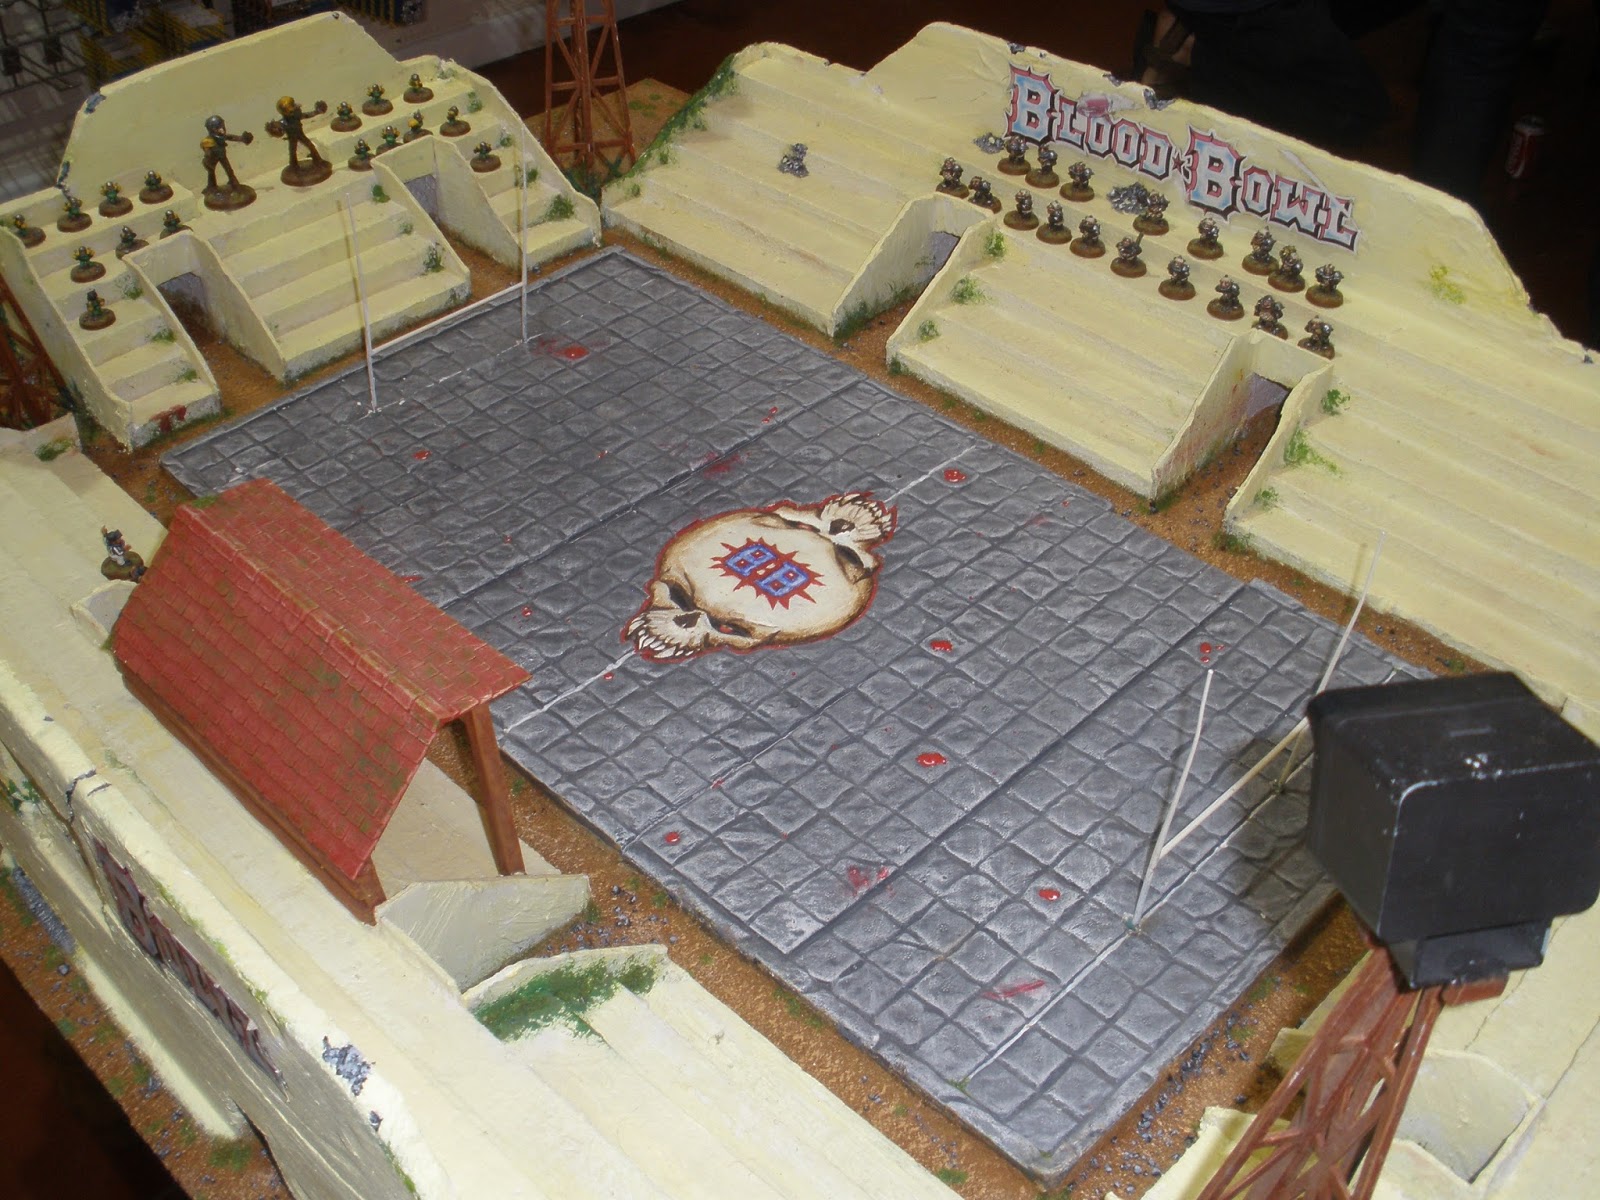
It all comes down to the next few turns! The next photo shows quite a bit of action. The two warband Ogres try to get stuck into the Orc archers and end up just getting stuck. The need to kill off 25% of the enemy before you can cause a rout test can make for the occasional tar pit. Vigareux and Grollo are even pushed back after one of the rounds of combat which was just enough to completely spoil the entrance of the Beastmen into the fray. Lord Savage himself attempts to charge the Shaman, Maliss Grobhurtz (and help the Undead take a huge step towards their victory conditions), but unwittingly crosses the line of a wind blast spell that is holding the skeleton infantry crossing the road at bay. The charge is failed and Maliss escapes his doom! The skeleton infantry near the Black Orcs turn to face the confused Orc General (who is failing/passing/failing/passing his Ld/Cl tests and kind of doing a need-a-wee dance on the spot) as his death is mandatory. Inevitably the fleeing Black Orcs rally on the table edge and reform facing the skeleton infantry's rear.

"Why did da skellingtons cross da road? Dey bleedin didnt cos I magicked em din I!" 
~ Maliss Grobhurtz, Orc Shaman


The Giant fails to rally and is duly scoffed by the ravenous Chimaera. The unit of skeletons that scared him off are free to turn towards the rear of the two Orc units threatening the graveyard but the Shaman's zone spells are keeping them back for the time being. The zombies have occupied the graveyard as a further delaying tactic and Mausolus can just be seen hovering around the opposite entrance. The Dark Elves from Savage's warband are taking potshots at Warboss Rob'imsum.

"Skellies to da lefta me. Skellies to da righta me. Skellies be'ind me. Vollied an shot at by bleedin elf pansies, will dis boar and ero fall, me wat barely fort at all?" ~ Orc Warboss Toady Rob'imsum.


The archers finally break and run, Lord Savage desperately tries to get his Ogre minions to restrain their pursuit so the warband can make it's way towards the forest but no-one gets between an Ogre and his lunch, not even their beloved master. The Black Orcs have pulled themselves together nicely and are making short work of their erstwhile tormentors.

"Vigareux! Grollo! Get back here you intolerable pair of vomitous, walking rugs!" ~ Lord Savage.


Just as all seems lost for the Orcs on their left flank fate intervenes once more. The Orc General is proving impervious to the Elven crossbow bolts, despite being rooted to the spot by indecision. The Shaman, Maliss, is able to upskirts and hide amongst the now victorious Black Orcs. Victory is slipping through Mausolus' bony fingers!

"Duz dat sownd like da boss ta yoo?" ~ Grollo.
"I dunno, less finish ittin deez litluns an den go an find owt." ~ Vigareux.


Over by the graveyard things look OK for the Undead. The Chimaera (immune to zone spells) has turned the tide of battle and killed his second  Orc regiment of the day. With the Giant that makes about 50 times his own body weight in dead enemy. He has wounded Fillhar Dring and is leisurely pursuing him; so close to achieving one of the victory conditions. The Undead cavalry are long vanquished, that's just a poorly packed away casualty you see poking his skull out.

"Gerrimoffgerrimoffgerrimoff!!!" ~ Fillhar Dring, Orc Shaman.


Lord Savage, the Ogres and the Beastmen are trying to sneak off quietly while the Elves are still flinging bolts uselessly at Warboss Toady. Maliss is perfectly safe in the unit of Black Orcs and the vicinity is distinctly lacking in the serious number of skeletons needed to dig him out.

"HEY BOSS! I DON'T FINK WE BIN SPOTTED!" ~ Grollo.


Warboss Toady finally has a brainwave; charge the Elves because they don't cause fear! Bizarrely he is unable to hurt any of the nimble Elves and actually receives a nick in return. Is there time to kill off the Orc General and take a step closer to victory? The windblown skeletons close in on the Black Orcs, mussed hair and all, one failed fear test here could be the key to an unlikely win for Mausolus.

"Never mind that tempting flank charge beasties! It's time to leave town in a hurry!" ~ Lord Savage.


My best hope of killing an Orc character crumbles as the Orc ladz near the graveyard elect to save their beloved Shaman by passing a fear test and charging the Chimaera. Anyway, as it turns out the Orc General survives the next round of combat with the Elves and the Black Orcs pass their fear test.

"Cheers lads! (*SNARL*, *SLASH*) Er, good luck! (*CRUNCH*, *SNAP*) Bye then!" 
~ Fillhar Dring, Orc Shaman.


Darkness shrouds the field of battle. Mausolus is in firm control of the graveyard and the entrance to his lair but he has failed to kill off the Orc leadership which would have scattered the goblinoid menace forever. The Orcs don't have the relic and though Lord Savage's warband survived the battle without taking a single casualty they failed to escape in time. Final result: Draw!

Thankfully, Mausolus is fairly sanguine about the days events and invites Savage downstairs for a bottle of wine before handing him a spare copy of 'Lichedom for Beginners'. 'That might come in handy', thinks Savage before setting off through the forest to the proving grounds.

"Phew! Back from da mouth o hell." ~ Warboss Toady, on his return home.


The End.

That was a 2000 point battle which was fought over roughly five hours. I learned a few lessons that might come in handy if I GM a game in the future but all in all it went very well indeed and was incredible fun.

I will throw up a couple of 'armies on parade' shots after this weekend is out of the way.

Thanks for stopping by!

Wednesday, 28 August 2013

The Battle of Broken Barrow. Part Two.

Introduction.

Part One.

Orc's POV (part one).

The next photo shows Lord Savage goading his pet ogres Vigareux and Grollo towards the Orc archers. The idea is to crush the Orc's left flank and circle around the back of the Orc main body to enable a simple escape. The Dark Elf crossbows are giving support fire while out of shot a badly deployed Beastman unit desperately tries to keep pace with events. The Giant appears to be making for the graveyard, possibly to dig for that relic. The idea was that a unit would be vulnerable while doing this but if the Giant goes in he would surely be unaffected by a few gravestones! A cheeky bit of tactics from Warboss Rob'imsum methinks. The skeleton hordes move up as fast as possible to desperately try and keep the Orcs too busy to think about the objective. The Orc archers keep up a steady rate of fire against one of the Undead infantry units and whittle them down significantly. It probably helped that the Shaman was accidentally counted as a front rank bowmen a couple of times!

"Wossat Shaman doin wi me bleedin bow! Gissit back yoo twonk!" ~ Grunk, rear rank Orc archer.


You can just catch a glimpse of a svelte Warlord Paul in his natural environment in this shot. Also, you can see the wreckage of the Orc right flank as it collapses under the pressure from a star-performing Chimaera and the Undead cavalry.  The Giant has been forced to abandon his dash for the graveyard and turn to face a unit of skeletons.

"Blahdy ell lads this wuns goin dahn ill farst. Dem dead fings jumped all on me dawgs da buggas". 
~ Arry the Ob-Ound Andler.


The two Orc units behind the Giant have a Shaman nearby to protect them. He starts to throw a few zone spells out there as well as frenzying up some of the lads. The successful Undead left is suddenly left seeming vulnerable to counter-attack.

 "Into the wall of burning light Master? Into the flames of true death? Master wills it? Very well! We give our lives once more!" ~ Kho'han, Mausolus' Master of Horse.


Yet another failed fear test sees an Orc unit turn and flee. The ensuing panic will affect the Black Orcs. The skeleton infantry unit tha has attracted the attention of the Giant turns to face it.

No wun tole us this scrap wood be aginst dees fings! I aint no nutta! ~ Attributed to an Orc soldier.


The Giant is poised to pounce on the pesky little bony things snapping at his ankles. He charges in and sweeps his mighty club back and forth killing... only one of them. Disaster! The Orc General declares a charge back in the direction of the skeleton infantry unit threatening to overwhelm his centre units.

"Hur hur, I big and strong. You are very tiny things with no big tree for club. I stomp on you and hit you with my club. Hey! Stay still!" ~ Mick Vast'un, Giant.


The numbers don't quite add up for Mick who becomes the latest in a string of fleeing Orc units to head for the hills. Worse is to come as the Chimaera has eaten all the Orcs it was chasing and is now poised to have Giant for pudding. The two Orc units on the Giants left are having more luck as they ignore the problems going on around them and stick to the task at hand. Under the capable leadership of Fillhar Dring they are shredding the Skeleton infantry in front of them and placing the graveyard under direct threat.

"Hur hur them things won't stay still I go and play with pussy cat hello pussy cat nice kitty hur hur." 
~ Mick Vast'un, Giant.


Things don't go well for the Undead cavalry. They triggered an instability test as they lined up for the charge against the Orcs which left them needing -1 to hit. As I subsequently declared the charge, muttering something about 'taking a new instability test which would override the first' and 'liking them odds', I almost inevitably rolled a 1 and saw them turn into useless shades for the rest of the battle. The rest of their battle was not to last that much longer as it turned out. Fortunately a couple of lucky 6s on instability tests for the skeleton infantry saw this part of the battlefield get bogged down nicely while I tried to get some reinforcements in place.

"The light! It burns us! It burns! NoOooOooo my SOooOooOooul!!!" ~ Kho' han.


The skeleton infantry unit attacking the Orc centre sees one of the enemy units off the table and leaves the Black Orcs a few millimetres from doom. This could be a key moment in the tussle, we've all seen units come back from the brink to perform a vital task!

"Ere, lads. Why are we runnin? We is dead ard an dat!" ~ Attributed to a Black Orc soldier.


That's it for part two, click here for part three, the climactic final chapter!

Thanks for stopping by!